DIY Christmas snow jars craft in three easy steps
I love a good Christmas craft that doubles as a decoration around my home. That’s why you are going to love these Christmas snow jars made from simple Mason jars and other supplies laying around your house. Take a look!

My sisters and I decided to get together to make a Christmas craft/decoration. So, these Christmas mason snow jars were perfect for the occasion. They are super easy but look expensive and gorgeous in any holiday home. In just a few simple steps, you’ll have a beautiful holiday decoration to enjoy all winter long.
Gather your craft supplies
You might already have a lot of these supplies at home. But if not, I purchased the majority of them at the dollar store. Here’s what you’ll need:
- Mason jars (mini, pint and/or quart)
- Fake snow
- Modge Podge
- Berries and greenery
- String or twine
- Fairy lights
- Hot glue gun
- Scissors

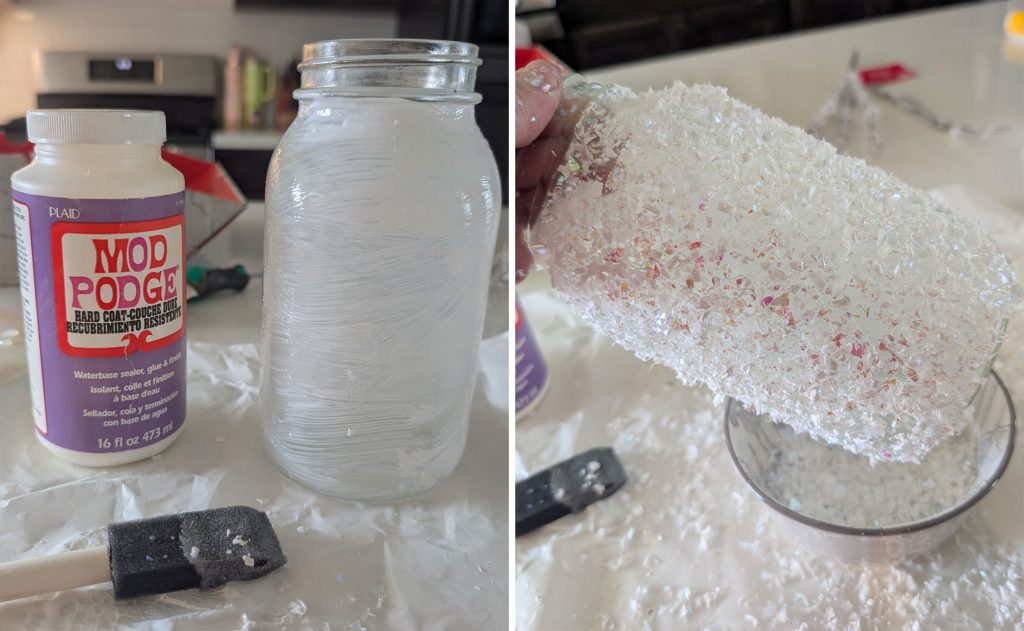
Step #1: Apply the Modge Podge and fake snow
Lay out a sheet of parchment paper to keep the glue and the fake snow from getting all over. Apply a thin layer of Modge Podge to the outside of each Mason jar. But don’t apply the glue to the upper lip of the jars. Then quickly sprinkle and gently pat the fake snow over the glue until the entire outside of the jar is covered.
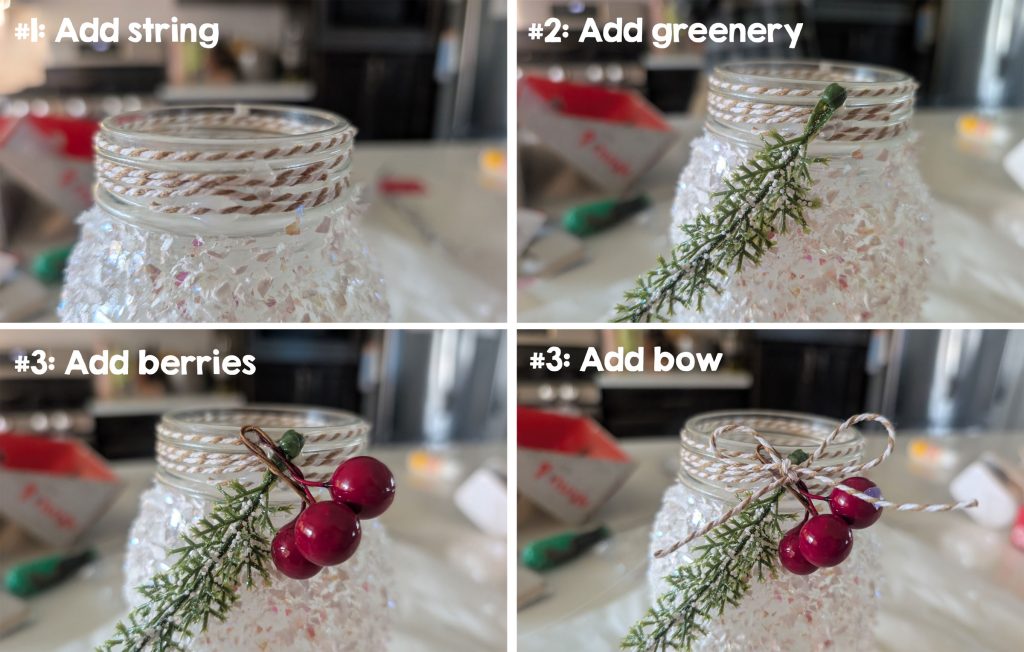
Step #2: Glue decorations to the top
Next, using a hot glue gun, glue the tip of some string or twine to the lip of the jar. Then wrap the strip around the lip three or four times until it is covered and then hot glue the other end to the jar.
Hot glue a small piece of greenery, berries and a small bow (made from the same string) in that order to the top of the jar. You can get creative add other types of decorations as well such as a small ornament or jingle bell.
#3: Add fairy lights
The final step to making your Christmas snow jars is adding the fairy lights. The lights are what give these Christmas decorations a magical touch. There are different colors you can choose from such as warm white, multi-color or cool blue. I prefer the warm white. Since these are LED lights, they should last all season long without having to replace them.

I really enjoyed making these Christmas snow jars. You can play around with the types of jars you use. I liked the look of a mini, pint and quart jars together. But you could also make three quart jar or even just one, depending on the space you are trying to decorate. Anyway, let me know what you thought of this craft in the comments below. Merry Christmas!!
More from My Silly Squirts: DIY Christmas BINGO party game


Wow, Maries Christmas snow jars look magical! I love the Modge Podge snow effect – so easy and less messy than real snow! Though Im slightly concerned about the upper lip glue-free zone – is that for jar hygiene? 😉 The hot glue decoration step is adorable, but I bet my cats will try to decorate them with fur first. Fairy lights inside? Genius! Theyll definitely outlast my cats interest. Using different jar sizes is a great tip – my house is a hodgepodge of mismatched jars, perfect for this! Thanks for the easy Christmas craft idea that wont drive me completely crazy! #DIYChristmas #MasonJarMagic