DIY paper fidget spinner kids craft with free template!
Fidget spinners are always a hit among kids and adults alike. But have you ever tried to make a paper fidget spinner? They’re way easier than you might think and they actually work! This is the perfect craft for summer, school, church group or just for fun. Check it out!

It’s always nice to have an arsenal of quick, easy and fun crafts for bored kids laying around the house. This one is great for boys and girls alike and it’s basically just a little bit of cutting and gluing. There are other DIY fidget spinners out there but they can be fairly complicated. That’s why you’ll love these paper fidget spinners. Let’s get started.
Download your FREE paper fidget spinner template
I designed four different colorful fidget spinner templates that you can download and print. Print each page on cardstock so the fidget spinners are sturdy and won’t rip. Pick your favorite design or make them all!
Download your two-page 8.5×11 PDF at the end of this blog post.

Gather your fidget spinner supplies
You might have a lot of the supplies for this DIY project right at home. Here’s the list of what you’ll need:
- Glue dots – you can also use regular glue, but the glue dots make it super easy
- Jump Rings – optional, however these make it spin a lot smoother
- Toothpicks
- Pennies
- Scissors
- Hole punch 1/8-inch – if you don’t have this size, you can make a hole with a toothpick
- Hot glue gun
- Fidget spinner PDF download
- Cardstock
- Gluestick

Step #1: Cut and glue together template
First, you’ll want to print the spinner template on cardstock and cut out each piece. Then, trace one of the spinner templates onto another piece of cardstock and cut that out. You should end up with three spinners cut out. The third piece makes the spinner extra sturdy. Glue all three pieces together with a glue stick and then punch a hole in the middle.

Step #2: Make it spin
Attach three pennies to each of the circles on one side of the spinner using glue dots. You can also attach them with another craft clue but the glue dots are quick and easy. Then, attach three paper circles on top of the pennies with glue dots.
Cut the tip of a toothpick and insert 1/4″ of the blunt end through the hole in the middle of the spinner and thread the jump ring onto the toothpick. Punch a hole in the middle of the remaining two paper circles. Thread one paper circle onto the toothpick so it rests over the jump ring.
Place a glue dot on the toothpick and paper circle and then add a big dab of hot glue. Hold the spinner with the other end of the toothpick and wait for the hot glue to dry. Repeat the same step on the opposite side. Then you’re done!

Step #3: Try out your new spinner!
Put your thumb and index finger opposite each other in the middle and give it a spin! For a homemade paper fidget spinner, I was impressed with how smoothly and long they spin. And it’s something kids can be proud of. I made all four of these spinners and each of them only took about 10 minutes each to assemble.
Here’s an instructional video I put together that explains step-by-step how to make this fun craft.
I hope you have fun making this paper fidget spinner. Let me know how it goes in the comments below.
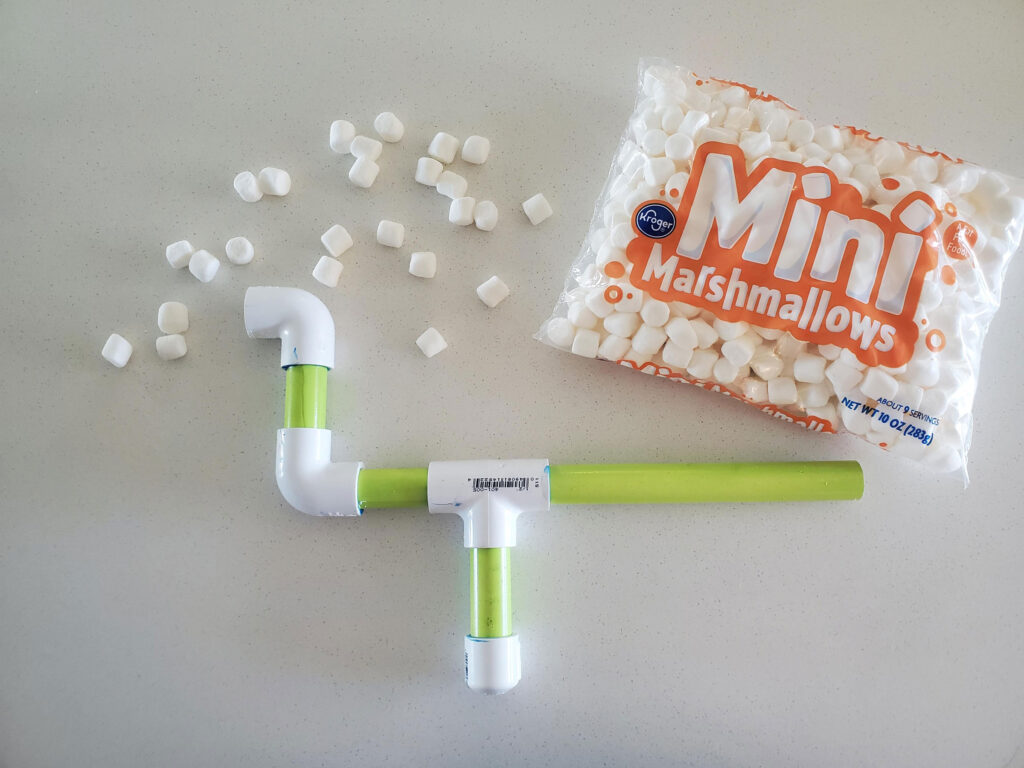
More from My Silly Squirts: How to make a $5 PVC marshmallow gun


15 Comments