Hang your own backyard string lights in three easy steps
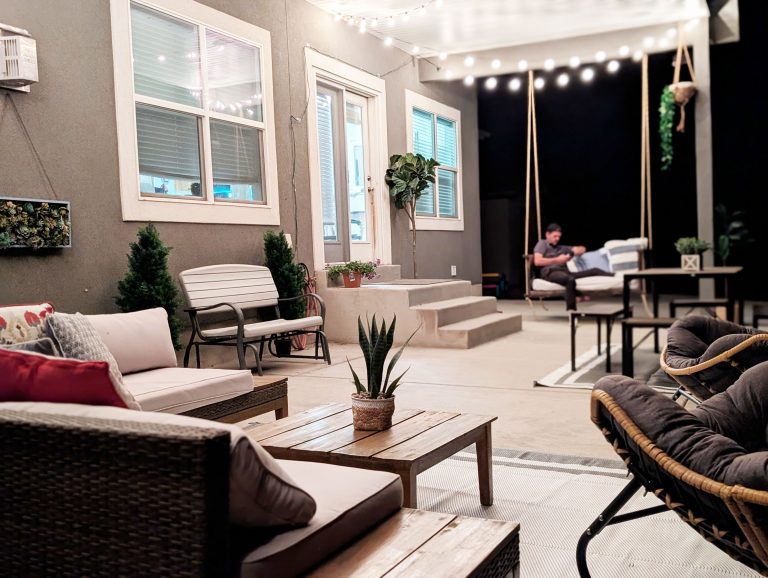
Backyard string lights are an easy way to glam up your backyard without much effort at all. And you don’t have to spend thousands of dollars an expensive awning or pergola either. This little project cost us about $150 but the results were priceless. Check it out!

I am not the handiest person, so I was a little bit intimidated before I started this project. But after a short trip to Home Depot, I realized this wasn’t going to be as hard as I thought. Plus, I had my husband to help me so that made it a little easier. Here’s how I did it.

Gather supplies for your backyard string lights
Before you can start hanging your lights, you need to gather all of the supplies. You can get a lot of them at Home Depot or Amazon. Here’s what you’ll need:
- 10-foot 1/2″ galvanized steel poles (2) – Make sure your poles have threading on the end so you can cap them off. We needed two for our patio but you may need more depending on how many lights you’ll be hanging. These cost us about $25 each.
- LED outdoor string lights – We got two boxes of 48-foot string lights and these are really high-quality. They should last you a long time. We got these on sale for $40 per box at Costco but you can get them on Amazon as well.
- 2-foot 1″ PVC pipes (2) – You need as many of these pipes as you have steel poles.
- #10 screw hooks – You’ll need about 10 of these.
- 1/2″ squeeze connectors (2) – These will be screwed onto the tops of the steel poles.
- 1/2″ steel pipe coupling (2) – These will connect the steel poles to the squeeze connectors
- Post hole digger – You don’t have to have one of these but it will make the digging part go a lot faster

Step #1: Dig the holes
First you’ll want to figure out how you’ll be hanging your lights so you can determine where to place the poles. We did a diagonal zig zag across our patio and to the house. So we only needed two poles.
Before you start digging, you need to make sure there’s no utility lines in the way. We called Blue Stakes of Utah and they marked our yard. There are similar companies in every state. Ironically, even after they marked our yard, I still ran into two utility lines! So be careful as you dig. It’s a big hassle if you break one of these lines.

Using your post hole digger, dig a hole about two feet deep. You want it at least that deep so that the pole is firm in the ground.

Step #2: Place the steel poles
Once your holes are dug, place the 1″ PVC pipes over the bottom of the steel poles. Then, connect the couplings and then the squeeze connectors to the tops of the steel poles.

Finally, place the PVC pipes with the pole on it into the holes. Fill the holes back up with dirt. Make sure someone is holding the pipes while you fill the hole with dirt to make sure it stay standing straight and tall.
Step #3: Hang the string lights
Yay! Your final step is to hang your string lights. We started on the corner of our home and zig zagged the lights from the house to a pole, back to the house, back to another pole and then finally back to the house. We connected the string light to the house by simply screwing a screw hook below the rain gutter. It was perfect actually.

To attach the string lights to the tops of the poles, simply unscrew the screw that is in the squeeze connector. You can either loop the string lights through and screw the screw back in, or you can screw a screw hook into the hole where the screw used to be. Either works.

You’re done! I was surprised how easy it was to hang these backyard string lights. I was so happy with the results too. It adds such a cozy ambiance to our backyard. We are definitely spending more time back there now. During the winter, we will just take take the lights down so they don’t wear out in the bad weather.

Here’s a YouTube video that I made explaining how we hung those lights.
I hope this was helpful as you’re planning how to hang your own string lights. Let me know how it goes in the comments below.
More from My Silly Squirts: DIY Mudroom shelves using IKEA bookcases