Step-by-step string art for beginners
String art for beginners is popping up all over the place nowadays and for good reason. It is so cute and ridiculously easy. When I saw a finished string art wall hanging for sale at a boutique for $50, I thought, “I could make that myself.” So I did. And I’m here to tell you that you can do it too! Let’s get started!


What you’ll need:
String art is very versatile. You don’t need very many supplies and you can make it the way you like it. There’s no right or wrong way to do it.
- Piece of wood
- String
- Wire nails
- Hammer
- Scissors
- Pencil
- FREE PRINTABLE – Heart String Art Patterns
The above printable has five different heart shapes that you can use depending on the size of your wall hanging. Just cut out the size heart that you would like.

Trace and hammer
Once you’ve cut out the heart pattern for your string art for beginners, lightly trace the outline of it directly onto the wood with a pencil. Then, begin gently hammering in the nails about a 1/2 inch apart along the outline. I just eyeballed it. Leave about half of the nail exposed above the wood. The most important thing is that you have plenty of nails. I used 39 nails for a 3×3 pattern. If you have too few nails, the heart won’t look very smooth.
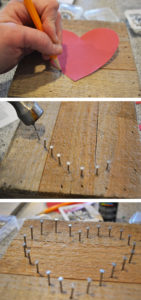
Start stringing
Now, you’ll need at least 12 feet of string. If your heart is larger than mine, you’ll need even more, maybe 15 to 20 feet. If you don’t have a long enough piece of string, the string art will look sparse.
Tie a knot with the end of the string to one of the nails on the side of the heart. Begin by making an outline of the heart by wrapping the string once around each nail. Once you’ve made your outline, start making your design. Stretch the string across the heart and wrap it around the head of a nail, then stretch it back to the other side and wrap it around another nail and so forth. You can make a pattern or it could be completely random. It’s whatever you want. When you’re done, make sure you tie it off on the same nail that you started on. Clip the remaining string.

String art tips and tricks
- Slow. Go slowly or else the string will slip off one of the nails and unravel.
- Wrap the string towards the outside of each nail every time.
- Don’t pull too hard. The nails will lean and bend and it won’t look uniform.
- Experiment with different colors. Maybe do half of the heart red and half pink.
- Try other backdrops such as canvas or corkboard. If you use canvas, try using long push pins hot glue a piece of cardboard to the back so the pins have something to keep them straight.
- Use other patterns such as a bird, text, house, etc. The sky is the limit!

Here’s some other string art that I’ve done. Take a look:


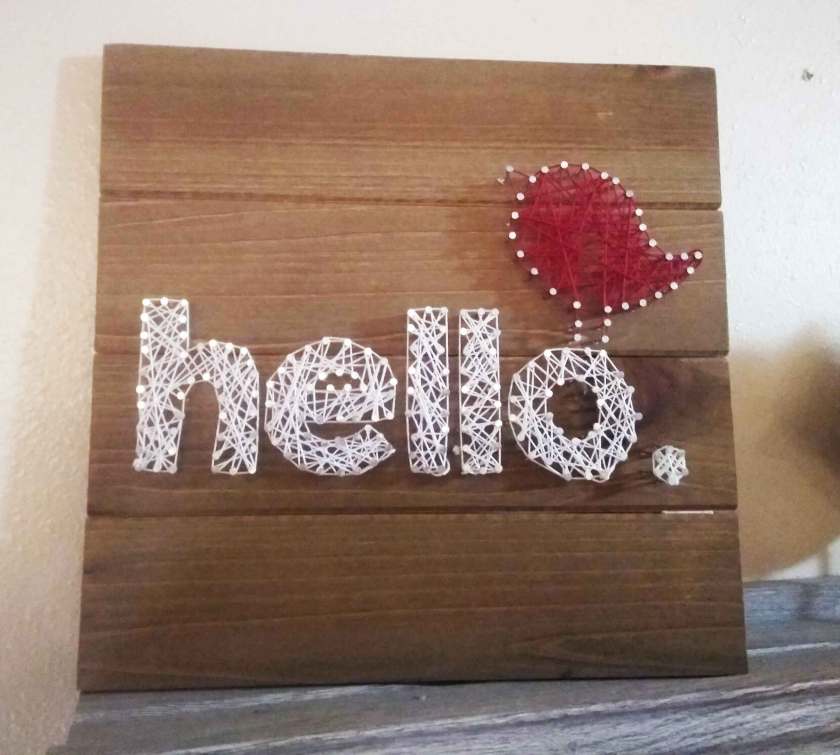
You can also buy a string art kit, which makes it all the more easier. What other string art projects have you done? Share your ideas in the comments below.
Related post: 3 awesome crafts using polymer clay


